It’s pretty simple. Seriously.
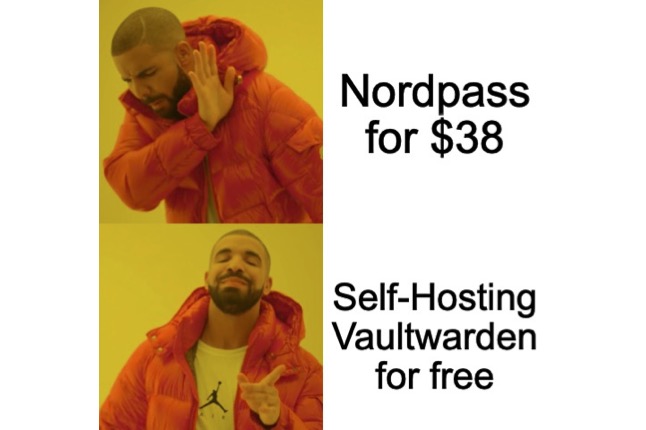
Alright. You have finally chosen to self-host. And you realize that you’ll never have pay for a secure password manager again now that you’ve discovered Vaultwarden. All you need now is an easy-breezy install guide.
Well lucky you! Here it is. Let’s get started installing Vaultwarden on your VPS. You’ll be living the self-hoster’s dream in no time. A quick explanation from Vaultwarden’s README:
Vaultwarden—An alternative server implementation of the Bitwarden Client API, written in Rust and compatible with official Bitwarden clients [disclaimer], perfect for self-hosted deployment where running the official resource-heavy service might not be ideal.
So there you have it. When this install is done, you’ll have your own self-hosted install, and you’ll be able to point to it via the Bitwarden mobile app. Double win.
Ok, so first, log into your VPS. If you’re logging in as root, remove the sudo part from the commands. Install the following dependency:
sudo apt update
sudo apt install -y argon2
Argon2 is a rock-solid password hashing algorithm. We want it for the install. Give it a moment to install. See the next steps just below.
cd ~
mkdir -p vaultwarden
cd vaultwarden
Just fyi, if you want to do the install elsewhere on your server, feel free. I’m just doing it from $HOME since it’s convenient and easy to follow.
Configuring our docker-compose.yml
Now that we’re in our install directory, let’s vim into a docker-compose.yml with the following command:
vim ./docker-compose.ymlPaste the following:
services:
  vaultwarden:
    image: vaultwarden/server:latest
    container_name: vaultwarden
    restart: unless-stopped
    ports:
      - "9273:80"  # host:container
    volumes:
      - ./vw-data:/data
    env_file:
      - .env
    environment:
      WEBSOCKET_ENABLED: "true"
      SIGNUPS_ALLOWED: "false"
      ADMIN_TOKEN: ${ADMIN_TOKEN}
      DOMAIN: https://vault.yourdomain.whatevz
You might be asking “why on earth is SIGNUPS_ALLOWED set to false?” Well, the reason lies in the ADMIN_TOKEN value. That token will allow you admin access at /admin, and inside you can invite users to create an account. This is the way to go to keep weirdos from flat-out creating accounts.
Let’s create that token, shall we?
openssl rand -base64 12
echo -n '<put a token value here>' | argon2 <value from openssl command> -e
Copy the hashed value that shows. Now let’s create the .env file so our docker-compose.yml knows where to find the ADMIN_TOKEN.
vim ./.envThen add the following into the .env (and yes, the quotes are needed!):
ADMIN_TOKEN='<value from the above echo command>'With that, Docker runtime configurations are complete. Let’s move along.
Configuring Nginx to Reverse Proxy
If you remember in the docker-compose.yml above, we’re serving container port 80 to host port 9273 with the - "9273:80" configuration. In Nginx, we now need to set up a reverse proxy that will serve host port 9273 to our url. We also need to tell Nginx where to find ssl certificates for the site, so that you can serve it over https correctly. Let’s go.
sudo vim /etc/nginx/sites-available/vault.yourdomain.here
For now, paste the following:
server {
    listen 443 ssl http2;
    server_name vault.domain.com;

    ssl_certificate     /etc/ssl/certs/ssl-cert-snakeoil.pem; #<-- certbot will overwrite this later
    ssl_certificate_key /etc/ssl/private/ssl-cert-snakeoil.key; #<-- certbot will overwrite this later

    ssl_protocols TLSv1.2 TLSv1.3;
    ssl_ciphers 'ECDHE-ECDSA-AES256-GCM-SHA384:ECDHE-RSA-AES256-GCM-SHA384:ECDHE-ECDSA-AES128-GCM-SHA256:ECDHE-RSA-AES128-GCM-SHA256:ECDHE-ECDSA-CHACHA20-POLY1305:ECDHE-RSA-CHACHA20-POLY1305';
    ssl_prefer_server_ciphers on;

    access_log /var/log/nginx/vault.domain.com.access.log;
    error_log /var/log/nginx/vault.domain.com.error.log;

    location / {
        proxy_pass http://localhost:9273;
	    proxy_http_version 1.1;
	    proxy_set_header Upgrade $http_upgrade;
	    proxy_set_header Connection "upgrade";
        proxy_set_header Host $host;
        proxy_set_header X-Real-IP $remote_addr;
        proxy_set_header X-Forwarded-For $proxy_add_x_forwarded_for;
        proxy_set_header X-Forwarded-Proto $scheme;
    }
}

server {
    listen 80;
    server_name vault.domain.com;

    return 301 https://$host$request_uri;
}
Heads-up: you’ll notice above that I’m pointing to the snakeoil temporary ssl certificates. This is strictly to pass the nginx -t config test later. You’ll need to change this out later with your actual certs. Otherwise, if you’re using Certbot, the cert paths will be overwritten automatically. I talk about how to set up certifications via Certbot in this post.
Next, we need to create our symbolic link between sites-available and sites-enabled in Nginx.
sudo ln -s /etc/nginx/sites-available/vault.yourdomain.here /etc/nginx/sites-enabled/vault.yourdomain.here
sudo nginx -t
The nginx -t command should return a successful result. If it doesn’t, go back and fix your shit bro. Otherwise, let’s reload Nginx:
sudo systemctl reload nginxTime to fire up Vaultwarden!
You should still be in your working directory that contains your .env and docker-compose.yml file. Confirm with a quick pwd and/or ls -lart. At this point, we can turn on Vaultwarden, finally!
docker compose up -dIn a browser, head to https://vault.yourdomain.here/admin. Enter the ADMIN_TOKEN value (not the hash value damnit!), and log in.
All Systems Go! …Right?
After logging into /admin, click on “Diagnostics”. You should see all-green indicators like the ones in the image below.

After confirming, you can head to the “Users” section, where you can invite users (including yourself duh) to create an account via email.
Conclusion
We’ve been through a lot together, I know. And in the end, installing Vaultwarden on your VPS really is simple. Now go forth, and never pay for a password manager again!